The TE(a)CH Doctor- Seven Quick Tips for Taking Your Courses Online
Virtual learning has quickly become a necessity in these trying times, and entrepreneurship education is no exception. Here are seven tips to help you create online course content and make it more engaging to reach your audience at a distance.

1. MODULARIZE. Online learners do not have the same level of synchronicity that you achieve in a face to face course so don’t expect your students to stay on task for hours as they do in a classroom. Break up your course into units where students can access content in bite-sized pieces. This allows them the flexibility to work in shorter periods and see progress. It is also a way to more quickly identify those who are struggling. For example, take a regular class session and break it up into Unit 1.1, unit 1.2, etc. Another bonus of this method is that you can release content more slowly giving you time to build in real-time if needed.
At a minimum name each module/unit in addition to its unit number. Giving the unit a catchy name makes your content feel more like chapters in a book. Here are some examples from my entrepreneurship courses:
- “It’s not what you sell, it’s how you sell it”
- “Facing barriers: affordable risk-taking”
- “Leaders as entrepreneurs”
2. PERSONALIZE. In the absence of seeing the instructor in the front of the classroom, strategically placing a headshot in your online classroom, on your social media and email profiles, and the title slide of every unit of your course reminds them that this is YOUR content – not canned content – and that you are a real person.
If possible, get a clear headshot taken in high resolution that is easily scaled. Most smartphones can capture a perfectly adequate head shot, using the front-facing (selfie) mode on your phone camera. Above all, remember you are connecting to people, so please no pictures of your dog in place of you!
Is there a place for video? Yes. If you are transferring content from face-to-face to online, chances are there isn’t time to record yourself in the high-quality environment necessary. However, a great way to start incorporating video into your course without going all-in is to record a welcome message to your students using your smartphone (again, in front-facing selfie mode). You can also post periodic video announcements just to remind them that you’re still here, bringing them course content.
3. AUDIO DRIVEN LECTURES. Instead of having everyone online at one time, consider taking your lecture slides and recording audio by slide. It can be done easily using a free app called Audacity where you can export to MP3 then import to your slide. This allows you to edit your “ums,” coughs, or other interruptions without having to start over. TIP: don’t record more than three minutes per slide or you will lose your audience.

4. USE SLIDE THEMES. If you are teaching multiple courses online, it helps to use different color themes to help denote different subjects. Use a consistent title slide that tells students the course name and unit number. You can find great free themes through Google. Look for ones that have animations to add some pizazz to your content. Every slide theme for a course should have a consistent color or master slide layout. And keep the number of fonts to a minimum. This is where the slide templates help the most.
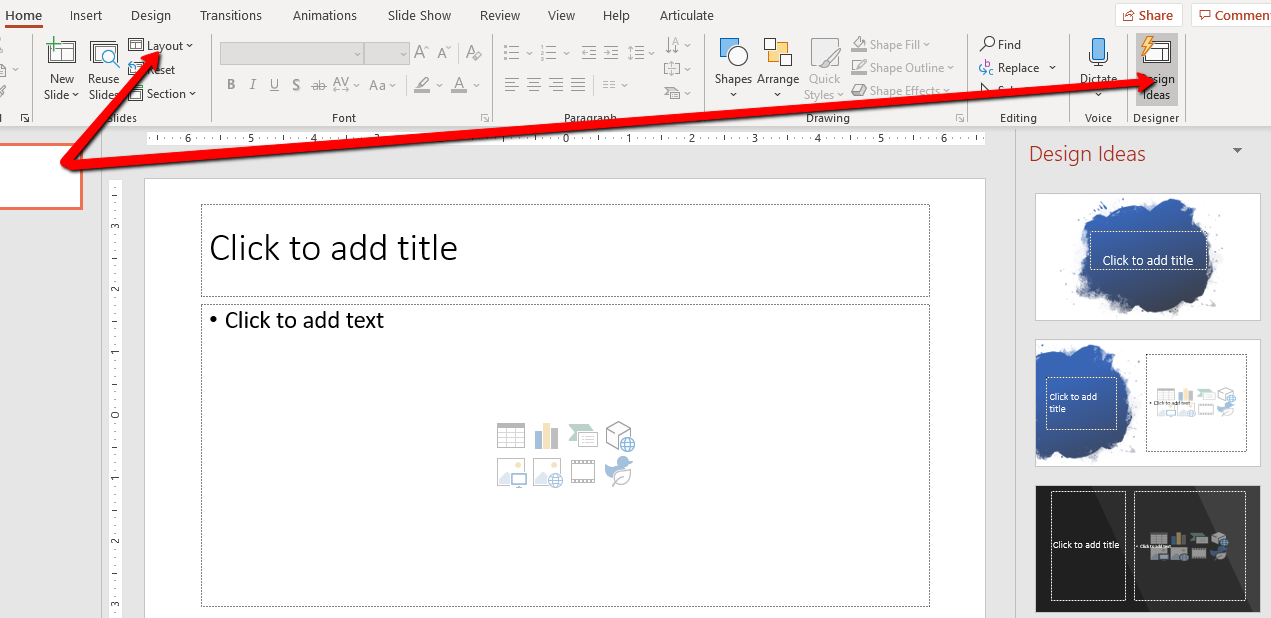
PowerPoint now offers an alternative called design ideas for use with a blank slide. Here’s a quick tutorial on how to use this feature:
- Open a presentation and select a blank new slide with the layout you need. In this case, a title and content as shown with the short red arrow below.
- To the far right of your toolbar, you will see “design ideas” that automatically populate as a panel. Select a design and then customize it with pictures, text, or charts that format easily with the design chosen.
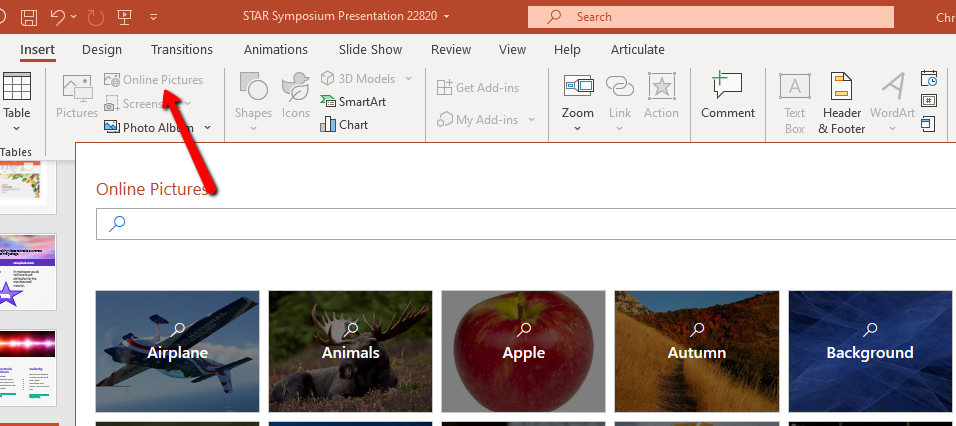
5. PICTURES AND MORE PICTURES. You can access images easily now right in PowerPoint by inserting online pictures (see picture below) and you can select creative commons so there is less of an attribution issue. I made this easy to annotate screenshot using a free app called Jing.
6. VIDEO BREAKS. Online students get bored quickly just reading content and will start moving faster without breaks, even if you are narrating your slides. A great way to break up the learning is to insert a video clip for them to watch on a topic. YouTube offers a wide variety of TedX speakers and other video content. Always tell your audience how long the video is when introducing it, so students can plan their viewing accordingly. Videos of more than 10 minutes get much lower viewership. My recommendation is that if you want to use a longer video, then make it an assignment and accompany it with a discussion board or writing assignment component.
7. TEST. When you develop your courses, continuously test what you have done by watching and listening to it yourself. If you have a strong desire to move forward or skip content for lack of time, chances are pretty good your students will be in the same frame of mind.
Stay tuned for future blogs on online entrepreneurship teaching and how you can develop engaging content that will make your online students feel part of a learning community. I like to tell my students we are all in the course together; we just don’t sit in the same room at the same time.
Dr. Christine Pigsley
Assistant Professor, Applied Leadership
Minnesota State University Mankato